Description
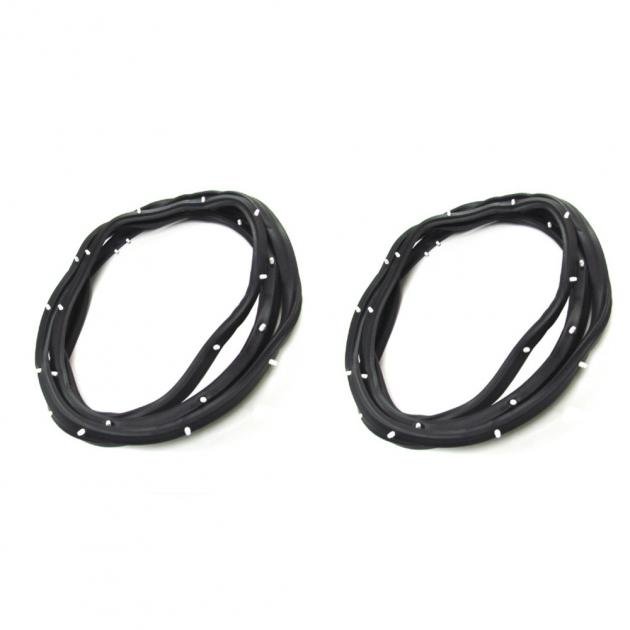
A precision-molded front door weatherstrip seal kit designed to restore a watertight, wind-resistant seal on classic and modern 2- and 4-door sedans (DWP 1210 55 fitment). This two-piece left and right kit replaces worn or cracked seals to prevent water intrusion, reduce road noise and vibration, and protect interior trim and finishes. Constructed from durable, weather-resistant rubber for long service life, the kit installs cleanly for an OEM-style fit — ideal for restoration projects and routine maintenance where reliable sealing and quiet operation are needed.Features:
- Fits 2- and 4-door sedans (DWP 1210 55 fitment).
- Durable, weather-resistant rubber compound resists cracking, shrinking, and UV degradation.
- Restores door seal integrity to prevent water leaks, drafts, and wind noise.
- Two-piece kit includes left and right hand seals for complete front door coverage.
- Easy to install with basic tools; designed for an OEM-style fit and finish.
- Ideal for restoration or replacement applications to protect interior trim and reduce vibration.
Installation / Application:
- Difficulty: 2/5
- Estimated time: 30-60 minutes
Suggested Tools:
- Flat-head screwdriver or trim removal tool
- Phillips screwdriver (if trim fasteners present)
- Rubbing alcohol or degreaser and clean rags
- Weatherstrip adhesive (recommended for older channels)
- Masking tape
- Gloves
Instructions:
- Park vehicle on level ground, roll windows up, and open the front doors to access the seal channels.
- Carefully remove the old weatherstrip: pry up any retaining lip or clips using a flat-head screwdriver or trim tool, pulling the old seal free from the channel.
- Clean the channel thoroughly with rubbing alcohol or degreaser to remove old adhesive, dirt, and residue; allow the surface to dry completely.
- Test-fit the new seal on the door to confirm orientation (left vs right) and that the ends align with door frame stops.
- If adhesive is recommended or needed, apply a thin bead of weatherstrip adhesive to the channel following the adhesive manufacturer’s instructions.
- Press the new weatherstrip firmly into the channel, working from one end to the other. Use masking tape to hold the seal in place if necessary while adhesive sets.
- Ensure the seal seats evenly along the entire length and that mating surfaces close without binding. Trim any excess material if applicable and permitted by the product design.
- Allow adhesive to cure per product directions (usually 30 minutes to several hours) before closing the door fully or driving the vehicle.
- Re-check fit after initial use and make small adjustments if any high spots or gaps are found.
About Precision Replacement Parts
Since 1986 Precision Replacement Parts has been a trusted name in the Automotive Glass Industry.
Our knowledge and experience in manufacturing millions of extruded and molded EPDM Rubber, PVC and HDPE based plastics, and various stamped and extruded metal products for the classic and late model industries has allowed Precision to expand our services into multiple product markets.
Along with our own USA based production facility, Precision also partners with 25 different manufactures worldwide with a reputation as a global leader supplying OEM and replacement products to a number of different industries. Our partnerships along with our own in-house manufacturing and fabrication capability gives Precision a unique position in helping to meet the expanding needs of customers everywhere, providing them with a sustained competitive advantage.